Simple Wall Decor Ideas using Found Objects

Easy diy wall decor – Transforming discarded items into stunning wall art is a rewarding and eco-friendly way to personalize your space. This approach allows for unique expression, reflecting your individual style and creativity while minimizing environmental impact. The possibilities are endless, limited only by your imagination and the treasures you discover.
Driftwood Coastal Canvas
Imagine a piece of weathered driftwood, smoothed by the relentless caress of the ocean, transformed into a captivating work of art. This project captures the essence of the sea, bringing a tranquil coastal vibe into your home. Find a piece of driftwood with interesting curves and textures. Clean it thoroughly, ensuring all sand and debris are removed. Once dry, you can leave it in its natural state, or enhance its beauty with a light sanding to further smooth its surface.
Then, simply attach it to the wall using strong adhesive or small, unobtrusive hooks. The raw, natural beauty of the driftwood speaks for itself, creating a minimalist yet impactful statement piece. The varying shades of grey and brown, coupled with the unique shape of the wood, will create a focal point that evokes the calming rhythm of ocean waves.
Bottle Cap Mosaic
Bottle caps, often overlooked and discarded, possess a surprising versatility. This project allows you to create a vibrant and personalized mosaic, showcasing your creativity and resourcefulness. Collect a variety of bottle caps in different colors and sizes. Clean them thoroughly to remove any labels or residue. Arrange the caps on a surface to create your desired design, perhaps a geometric pattern, a whimsical shape, or even a simple, colorful arrangement.
Once you are satisfied with the arrangement, use a strong adhesive to fix the caps to a sturdy backing, such as a piece of plywood or canvas. Seal the finished mosaic with a clear sealant to protect it from wear and tear. The result is a shimmering, textured masterpiece that adds a touch of playful whimsy to any room.
Imagine a sunburst design, with the caps radiating outwards from a central point, creating a dazzling display of color and texture.
Fabric Scrap Collage
Fabric scraps, remnants from past sewing projects, hold the potential to become a vibrant tapestry on your wall. This method allows you to showcase a variety of textures and colors, creating a unique and personalized artwork. Gather your fabric scraps – the more varied in texture and color, the more interesting the final piece will be. Cut the fabrics into various shapes and sizes, from simple squares and rectangles to more intricate designs.
Arrange the pieces on a backing, such as a large piece of canvas or even a repurposed piece of cardboard. Use fabric glue or a sewing machine to secure the fabric scraps in place. You can create a structured pattern or a more free-flowing, abstract design, depending on your preference. The finished collage will be a rich, tactile piece, adding a splash of color and personality to your space.
Think of layering different fabrics to create depth and texture, perhaps using sheer fabrics over denser ones to create a sense of movement and light.
Keychain Constellation
Transform a collection of old keys and keychains into a whimsical and nostalgic constellation. This project is a great way to repurpose items that might otherwise be discarded, transforming them into a unique piece of wall art. Gather your old keys and keychains. Clean them thoroughly to remove any dirt or grime. Arrange them on a wall in a constellation-like pattern, perhaps mimicking a familiar constellation or creating your own unique design.
Use strong adhesive or small nails to secure the keys and keychains to the wall. The varying shapes and sizes of the keys and keychains, combined with the metallic sheen, will create a striking visual effect. Consider adding small LED lights behind the keys to create a glowing constellation effect.
Nature’s Pressed Flower Frame
Pressed flowers, delicate and ephemeral, can be transformed into a timeless piece of wall art. This project allows you to capture the beauty of nature, creating a piece that is both elegant and sentimental. Gather various flowers and leaves. Press them between sheets of absorbent paper, placing them inside heavy books for several weeks to remove excess moisture.
Once dried, carefully arrange the pressed flowers and leaves within a frame. You can create a structured arrangement or a more free-flowing, abstract design. The frame itself can be a simple, unadorned frame, or a more ornate one, depending on your desired aesthetic. The resulting artwork is a delicate and evocative reminder of nature’s beauty, adding a touch of elegance and tranquility to your space.
Consider using a variety of colors and textures, perhaps incorporating grasses and ferns alongside flowers, to create a more dynamic composition.
Unleash your inner artist with easy DIY wall decor! Transforming blank spaces is surprisingly simple, and the festive spirit extends beyond walls. For stunning centerpiece inspiration, check out these breathtaking dia de los muertos table decor ideas; the vibrant colors and designs can easily inspire your next wall art project, bringing that same celebratory energy into your home.
Get creative and personalize your space with unique, handcrafted wall decorations.
Easy Painting Techniques for Walls & Canvas: Easy Diy Wall Decor

Unleash your inner artist with these simple yet effective painting techniques! Whether you’re dreaming of a vibrant accent wall or a stunning canvas masterpiece, these methods are perfect for beginners and guarantee satisfying results. No prior experience is needed – just a dash of creativity and a willingness to experiment.
Transforming your living space or creating beautiful artwork is surprisingly accessible. These techniques emphasize ease of execution while still allowing for impressive visual impact. The key lies in understanding the basics of color mixing, brushstrokes, and texture creation. With a little practice, you’ll be amazed at what you can achieve.
Sponge Painting, Easy diy wall decor
Sponge painting offers a wonderfully textured finish, perfect for adding depth and visual interest to walls or canvases. The irregular shapes created by the sponge create a unique, almost organic feel. For walls, consider using a large sea sponge for broad coverage, achieving a subtle, mottled effect. For canvases, experiment with smaller sponges to create detailed patterns or textures.
Begin by applying a base coat of your chosen background color. Once dry, dip a sponge into a contrasting color, dabbing off excess paint to avoid overly saturated marks. Lightly press the sponge onto the surface, varying the pressure to create different intensities of color and texture. Overlapping strokes will build depth.
Color Blocking
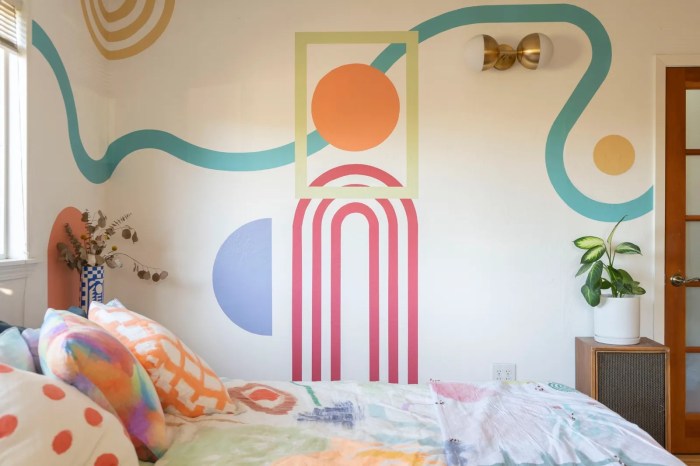
Color blocking is a bold and modern technique that uses blocks of solid color to create striking visual impact. This technique is remarkably simple yet produces professional-looking results. On walls, this might involve painting large sections in contrasting colors, creating a geometric pattern. On a canvas, it could involve creating a series of interconnected or juxtaposed rectangles, squares, or other shapes.
For either application, start with a well-taped design to ensure clean lines. Apply each color in even coats, allowing each layer to dry completely before applying the next. The beauty of color blocking lies in the deliberate simplicity and powerful visual contrast. Experiment with complementary or analogous color schemes for maximum impact.
Dry Brushing
Dry brushing is a technique that utilizes a minimal amount of paint on a stiff-bristled brush to create a textured, almost scratchy effect. This is ideal for adding subtle highlights, creating a sense of movement, or mimicking the look of aged or distressed surfaces. For walls, dry brushing can be used to highlight architectural details or create a subtle antiqued look.
On a canvas, it can be used to add texture to a landscape, or to create a unique background for other painting elements. Load a small amount of paint onto a stiff-bristled brush. Then, wipe off most of the paint onto a paper towel until the brush is almost dry. Lightly drag the brush across the surface, using short, controlled strokes.
The resulting effect is a light, textured application of color.
Creating a Simple Abstract Painting on Canvas
This step-by-step guide will lead you through creating a simple yet visually engaging abstract painting. The focus is on layering colors and textures to build depth and visual interest.
- Prepare your canvas: Choose a canvas size that suits your space and preference. Prepare your workspace with newspaper or a drop cloth to protect your surfaces.
- Base coat: Apply a thin, even layer of a neutral base color such as off-white, light grey, or a muted beige. Allow this to dry completely.
- Layering colors: Using a palette knife or a large brush, apply several dabs of contrasting acrylic paints to the canvas. These can be bold colors or more subtle hues, depending on your preference. Don’t worry about blending them perfectly at this stage.
- Blending and texturing: Using a clean brush or a palette knife, gently blend some of the colors together, leaving others distinct. Use the palette knife to create textured strokes or to drag the paint across the surface. Experiment with different techniques to build layers and depth.
- Adding details: Once the main colors are applied, you can add finer details using a smaller brush or a toothpick. This could involve adding thin lines, dots, or other small elements to enhance the composition.
- Finishing touches: Allow the painting to dry completely. Once dry, consider adding a protective sealant to preserve your artwork.
General Inquiries
What if I don’t have artistic skills?
Many of these projects require minimal artistic skill. Focus on simple techniques and let your creativity guide you. Imperfections add character!
Where can I find affordable frames?
Thrift stores, flea markets, and online marketplaces are excellent sources for affordable and unique frames.
How do I choose colors that complement my room?
Consider your existing color palette and choose complementary or contrasting colors to create visual harmony or a bold statement.
What if I mess up a project?
DIY allows for experimentation. Don’t be afraid to try again or adapt the project to salvage a mistake. Embrace the learning process!

