Creating Sea Glass Wall Art

Sea glass wall decor – Embark on a journey of artistic expression, transforming humble sea glass treasures into breathtaking wall art. This isn’t just crafting; it’s a celebration of nature’s artistry and your own creative spirit. Let’s delve into the process, equipping you with the knowledge and confidence to create stunning pieces.
Sea Glass Mosaic Wall Art Creation Steps
Creating a sea glass mosaic involves a series of carefully considered steps. Proper planning and preparation are key to achieving a polished and professional result. This detailed approach ensures a successful and enjoyable creative process.
- Design and Planning: Begin by sketching your design on paper. Consider the size, shape, and color palette of your mosaic. This preliminary step helps visualize the final product and ensures efficient use of your sea glass pieces.
- Material Gathering: Gather your sea glass, ensuring a variety of shapes, sizes, and colors to create visual interest. Acquire your backing material (e.g., plywood, a sturdy canvas), adhesive (e.g., strong craft adhesive, grout), and grout (if using a grout method) in a color that complements your sea glass.
- Surface Preparation: Clean your backing material thoroughly and apply a primer if necessary to ensure proper adhesion. This crucial step lays the foundation for a long-lasting piece of art.
- Sea Glass Arrangement: Arrange your sea glass pieces on the backing material according to your design. Experiment with different arrangements until you achieve the desired aesthetic. Consider using spacers to maintain consistent spacing between the pieces.
- Adhesive Application: Carefully apply adhesive to the back of each sea glass piece and firmly press it onto the backing material, following your planned arrangement. Work methodically, section by section, to ensure a clean and even application.
- Grouting (if applicable): Once the adhesive is completely dry, apply grout between the sea glass pieces, filling any gaps. Use a grout float to spread the grout evenly and remove excess. Allow the grout to dry completely before cleaning any residue.
- Sealing (optional): Apply a sealant to protect your mosaic from moisture and damage. This step enhances the longevity and beauty of your finished artwork.
Sea Glass Adhesion Techniques
The choice of adhesive greatly influences the longevity and aesthetic appeal of your sea glass art. Each method offers unique advantages and requires specific considerations.
- Strong Craft Adhesive: This is a versatile option, suitable for various backing materials. Ensure the adhesive is specifically designed for adhering glass to your chosen surface.
- Grout: Grout provides a robust and durable bond, filling the gaps between sea glass pieces for a seamless look. Choose a grout color that complements your sea glass palette.
- Epoxy Resin: For a more professional finish, epoxy resin can be used to create a smooth, glossy surface. This method requires precision and experience, but offers exceptional durability and visual appeal.
Challenges and Solutions in Working with Sea Glass
Working with sea glass presents unique challenges. Understanding these potential hurdles and having solutions ready ensures a smoother creative process.
- Irregular Shapes: The naturally irregular shapes of sea glass can make precise arrangement difficult. Solution: Plan your design carefully, allowing for variations in shape and size. Use spacers to maintain consistent spacing.
- Fragility: Sea glass can be fragile and prone to chipping. Solution: Handle sea glass carefully and use appropriate protective gear. Avoid excessive force during arrangement and grouting.
- Adhesion Difficulties: Some adhesives may not bond effectively with sea glass. Solution: Choose a high-quality adhesive specifically designed for glass and ensure proper surface preparation.
Creating a Simple Sea Glass Frame, Sea glass wall decor
A simple sea glass frame offers a beautiful way to showcase your sea glass collection or enhance an existing piece of art. This step-by-step guide simplifies the process.
Right, so sea glass wall decor is totally lush, right? Gives a proper coastal vibe, but if you’re after something a bit more, you know, statement, then check out these wall clock decor large options; they’re mega. Then you could totally offset that with some smaller sea glass pieces – a proper blend of styles, innit?
- Gather Materials: Obtain a simple wooden frame, sea glass pieces, strong adhesive, and sealant.
- Prepare the Frame: Clean the wooden frame thoroughly. Sand any rough edges for a smoother finish.
- Sea Glass Arrangement: Arrange your sea glass pieces along the edges of the frame, experimenting with different patterns and colors.
- Adhesive Application: Apply a strong adhesive to the back of each sea glass piece and press it firmly onto the frame.
- Drying and Sealing: Allow the adhesive to dry completely. Once dry, apply a sealant to protect the sea glass and frame from moisture and damage.
Display and Placement of Sea Glass Wall Decor

Your sea glass artwork, a testament to the ocean’s artistry and your creative spirit, deserves a stage worthy of its beauty. The right placement will amplify its inherent charm and transform a simple wall into a captivating focal point. Let’s explore the best ways to showcase your creation.
Careful consideration of lighting, surrounding décor, and the piece itself will determine the ideal location and presentation. Remember, the goal is to let the sea glass shine, both literally and figuratively.
Suitable Locations for Sea Glass Wall Decor
The inherent tranquility of sea glass lends itself to various spaces within your home. Consider areas where the piece can be appreciated without competition from overly busy patterns or distracting elements. Hallways, entryways, and living rooms often provide excellent backdrops, allowing the artwork to welcome guests and enhance the overall ambiance. Bathrooms, with their often calming color palettes, can also create a stunning showcase, especially if the sea glass art incorporates blues and greens.
Bedrooms, however, might benefit from smaller, less dominant pieces to avoid overwhelming the space’s peaceful atmosphere. The key is balance and harmony.
Framing and Mounting Options for Sea Glass Wall Art
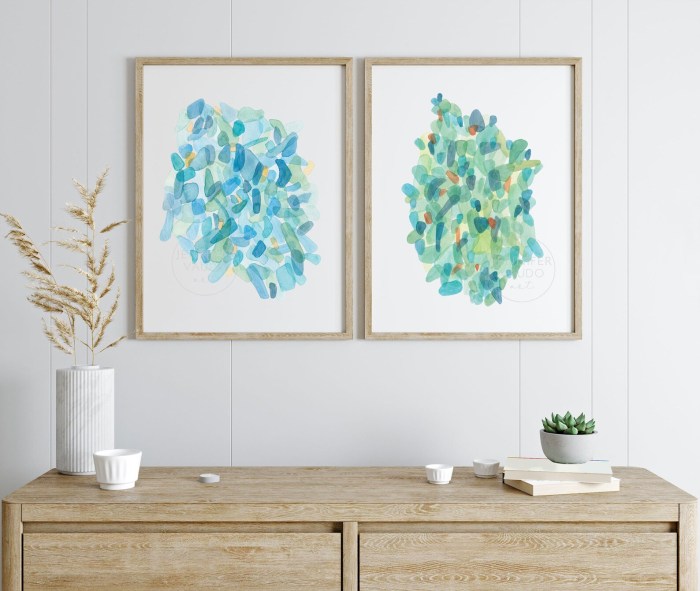
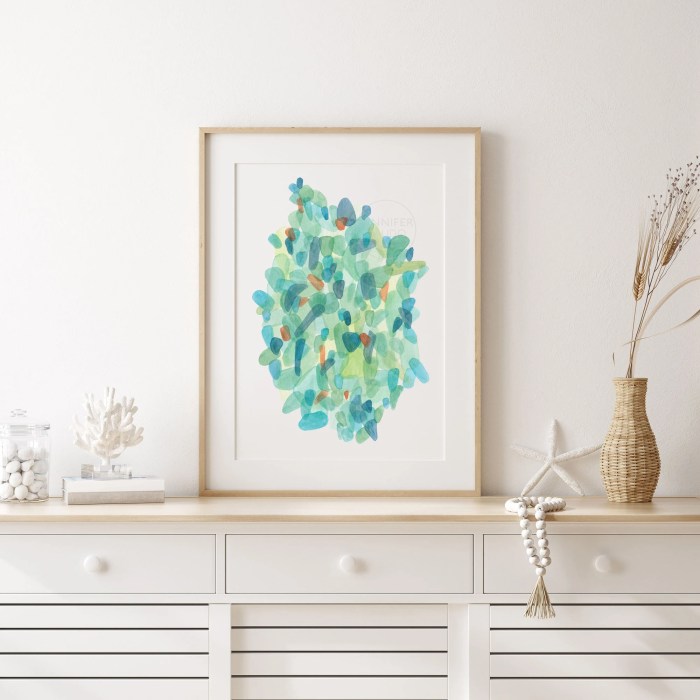
The frame and mounting method you choose dramatically impact the final presentation of your sea glass art. A simple, minimalist frame allows the sea glass to take center stage, highlighting its natural beauty and unique textures. Consider sleek, metallic frames in silver or bronze to complement the subtle shimmer of the sea glass. Alternatively, a rustic wood frame can create a warm, beachy feel, perfect for coastal-themed décor.
For a more modern aesthetic, consider frameless mounting techniques, using clear adhesive or specialized clips to secure the artwork directly to the wall, creating a clean, contemporary look. The choice depends on your personal style and the overall design of your home.
Impact of Background Colors and Textures on Sea Glass Decor
The background against which your sea glass art is displayed plays a crucial role in enhancing its visual appeal. Light, neutral backgrounds, such as off-white, beige, or light gray, create a clean and elegant backdrop, allowing the sea glass’s colors to pop. Darker backgrounds, such as navy blue or deep green, can create a dramatic contrast, making the sea glass appear to glow.
Textured walls, such as those with a subtle plaster finish or exposed brick, can add depth and visual interest, creating a more dynamic display. Conversely, smooth, painted walls provide a clean, uncluttered setting that allows the sea glass to stand out. Experimentation is key to discovering the perfect backdrop for your unique piece.
Choosing the Right Lighting to Enhance Sea Glass Wall Art
Lighting is paramount in showcasing the subtle nuances and captivating shimmer of sea glass. The right illumination will transform your artwork from simply beautiful to breathtaking.
- Natural Light: Position your sea glass art near a window to take advantage of natural light. Avoid direct sunlight, however, as this can fade the colors over time.
- Accent Lighting: Use strategically placed track lighting or picture lights to highlight the texture and color variations within the sea glass. Aim for a warm, soft light to avoid harsh shadows.
- Avoid Overhead Lighting: Overhead lighting can create harsh shadows and wash out the delicate colors of the sea glass. Instead, opt for softer, more focused illumination.
- Dimmable Lighting: Choose dimmable lights to control the intensity and create the perfect ambiance. A dimmer switch allows you to adjust the lighting to suit different moods and times of day.
- Consider the Color Temperature: Warm white light (around 2700K) tends to enhance the natural colors of sea glass, while cooler white light (around 5000K) can make it appear more vibrant. Experiment to find the best balance.
Sea Glass Wall Decor in Interior Design
Sea glass, with its inherent beauty and evocative connection to the ocean, transcends mere decoration; it becomes a powerful design element capable of transforming any interior space. Its subtle hues and unique textures offer a versatile palette, seamlessly integrating into a multitude of design aesthetics, adding a touch of coastal charm or sophisticated elegance, depending on the application.Sea glass wall decor’s adaptability allows it to enhance diverse interior design styles, from the rustic charm of a beach cottage to the minimalist chic of a modern apartment.
Its natural variations in color and shape provide a captivating focal point, adding depth and visual interest to any room. The inherent tranquility of sea glass also contributes to a calming atmosphere, making it a perfect choice for spaces designed for relaxation and rejuvenation.
Sea Glass Decor in Different Rooms
Sea glass wall art effortlessly complements various room styles. In a bathroom, a mosaic of sea glass tiles could create a stunning backsplash, reflecting light and adding a spa-like ambiance. Imagine a calming, neutral-toned bathroom with soft lighting, where a sea glass mosaic backsplash behind a freestanding tub creates a focal point that radiates serenity. The cool, smooth textures of the sea glass would complement the often cool tones of a bathroom, creating a cohesive and visually appealing space.
In a bedroom, a framed collection of sea glass pieces arranged in a pleasing pattern could serve as a calming headboard accent, fostering a tranquil atmosphere conducive to rest. Consider a serene bedroom with a whitewashed wood headboard. A framed display of sea glass, predominantly in shades of pale blues and greens, is placed directly above the headboard.
The subtle shimmer of the sea glass enhances the calming effect of the room’s overall light and airy aesthetic. For a living room, a larger, more elaborate sea glass wall sculpture could become a captivating conversation piece, adding a touch of coastal sophistication. Picture a spacious living room with a neutral color palette. A large, artistically arranged sea glass wall sculpture, featuring a variety of colors and shapes, is mounted above a fireplace mantel.
This piece acts as a stunning focal point, drawing the eye and adding a touch of unique coastal elegance to the room.
Visual Examples of Sea Glass Wall Decor
Image 1: A coastal-themed living room with whitewashed walls and natural wood furniture. A large, irregularly shaped frame showcases a collection of sea glass pieces, varying in color from deep greens to pale blues and whites. The frame itself is made of driftwood, further enhancing the coastal theme. The sea glass’s organic forms and colors complement the natural textures of the room, creating a harmonious and relaxed atmosphere.
The placement above the sofa makes it a prominent yet subtly calming focal point.
Image 2: A minimalist bedroom with white walls and light gray flooring. A small, square frame containing a carefully arranged pattern of sea glass in muted shades of gray and white is placed on a bedside table. The understated elegance of the sea glass complements the minimalist design, adding a touch of subtle texture and visual interest without overwhelming the room’s clean lines.
The simple frame maintains the minimalist aesthetic, while the sea glass provides a soft, calming counterpoint to the otherwise neutral palette.
Image 3: A bathroom with a predominantly blue and white color scheme. A sea glass mosaic forms a beautiful backsplash behind a white porcelain sink and vanity. The mosaic incorporates varying shades of blue, green, and white sea glass, creating a dynamic and visually appealing focal point. The sea glass’s cool tones enhance the bathroom’s spa-like atmosphere, reflecting light and creating a sense of serenity.
The smooth, polished surface of the sea glass adds a luxurious touch to the overall design.
Integrating Sea Glass Wall Decor into a Coastal-Themed Room
Sea glass lends itself beautifully to coastal-themed rooms. To maximize its impact, consider these options:
- Sea Glass Mosaic Backsplash: A mosaic of sea glass tiles creates a stunning and unique backsplash in the kitchen or bathroom, reflecting light and adding a touch of the ocean’s tranquility.
- Framed Sea Glass Collections: Arrange sea glass pieces of varying sizes and colors in frames of driftwood or simple, neutral-colored materials to create captivating wall art.
- Sea Glass Sculptures: Larger, more elaborate arrangements of sea glass can serve as striking focal points, adding texture and visual interest to the room.
- Sea Glass Mirrors: Incorporate sea glass into the design of a mirror frame, adding a touch of coastal charm and reflecting light to brighten the space.
- Sea Glass Candles: Place sea glass pieces around candles for a calming and visually appealing centerpiece on a table or mantelpiece.
Expert Answers
How do I clean sea glass for crafting?
Gently wash sea glass with warm soapy water and a soft brush. Rinse thoroughly and allow to air dry.
What type of adhesive is best for sea glass?
Strong adhesives like epoxy or specialized glass adhesives are recommended for long-lasting results.
Can I use sea glass outdoors?
Use weather-resistant adhesive and sealant if using sea glass outdoors to protect it from the elements.
Where can I find sea glass for my projects?
You can find sea glass on beaches, purchase it online, or from craft stores.
How do I prevent sea glass from chipping during crafting?
Handle sea glass carefully with gloves and use appropriate tools to minimize the risk of chipping.


